
This is going to be a mini how-to on replacing electrical in an old house. We are not electricians and don't pretend to be experts, but we do have some experience with old houses and electrical work. This is our second house that we rewired and we have a few tricks. I'm not going to touch upon more difficult things like running the wires into the circuit breaker box or mapping out the old circuits and new circuits. I'm just going to go over the basics of running the wires and installing outlets and lights.
Our house had very old knob and tube wiring when we bought it. We were quoted $25,000 to upgrade it to modern wiring and the majority of that was labor. This is mostly because a lot of time is spent crawling around in crawl spaces and attics and it sometimes takes hours to run one wire in old houses (see here). Since one of us doesn't mind crawling around in tight, dirty, gross spaces tooo much (at least if it saves us thousands of dollars) we opted to do it ourselves. If you plan on doing any electrical work, make sure you do your homework and you always turn off the main circuit breaker.
Here are some things that you will need. You will also need electrical tape. The wire and wire cutters are an obvious need. Even if you are working in the daylight (which I highly recommend) you will need to look into holes and communicate with the person in those teeny tiny spaces and using a flashlight makes that a lot easier.

You will also need this. It is a fishing line made out of pretty stiff metal. It makes running wires so much easier since it is stiffer then the wire so it is less likely (although not impossible) to get stuck in the wall.

If you are replacing old wires then you should already have your holes. The trick here is knowing what bay you need to feed your fishing line down in order to feed it through your hole. We had to drill holes from the attic down and the crawl space up in order to feed the wires into the bays and so we didn't want to drill extra holes. To make sure we were going in the correct bay, I would use "land marks" on the ceiling that Nate could see to give him the general location of the bay. We would also use knocking to narrow it down more and then if he started drilling, small bits of dirt would fall down and I would used the flashlight to make sure it was falling in the correct bay. If no dirt fell, we would reevaluate his position.
Once we had our hole, we would use the fishing line and feed it down the bay. Sometimes we got lucky and the fishing line came right through the hole and other times it took a few tries and tweezers to pull it through (some of our holes were big enough for me to reach my hand in).

After the fishing line was through the hole, we attached the wire to the end of the line. We used electrical tape to really attach the wire. This made it so that we didn't have to re-feed the line when the wire inevitably detached itself.

Nate would detach the wire from the line once he pulled it through the wall and then pulled enough wire to run it to the appropriate spot. I then cut the wire on my end and folded it over so it wouldn't pull through.
For this particular spot, we were also adding a new outlet below this light for my sewing machine (it is above the built in dresser which is why it's sideways). We marked out the spot by tracking the box.

Then we drilled holes in the corners so that we could fit the jig-saw blade in to cut out the area.


We then fed a wire from the light ( that we had just fed the wire to) down to the outlet hole.

We fed the wire through the back of on old work 1-gang box (they have little flaps that when you screw in, latch to the wall so it is held in place)

And then stripped off the outer casing (sorry for the blurry pics... they were taken quickly).

We used the wire cutters to expose the tips of the black and white wire

The ground wire was attached to the green ground screw on the outlet and the black and white wire were pushed into the quick connect spots on the back and the screws were tightened. (we give the wires a tiny tug to make sure they are really are attached)

Once all the wires were connected, we were able to attach the outlet to the outlet box

And add the outlet cover.

We then moved up to the light. The old boxes were very shallow and luckily they still sell the very shallow light boxes. We fed both the wire coming from the outlet and the wire from the attic through the box, attached the box to the stud behind it and stripped off the casing for both wires.
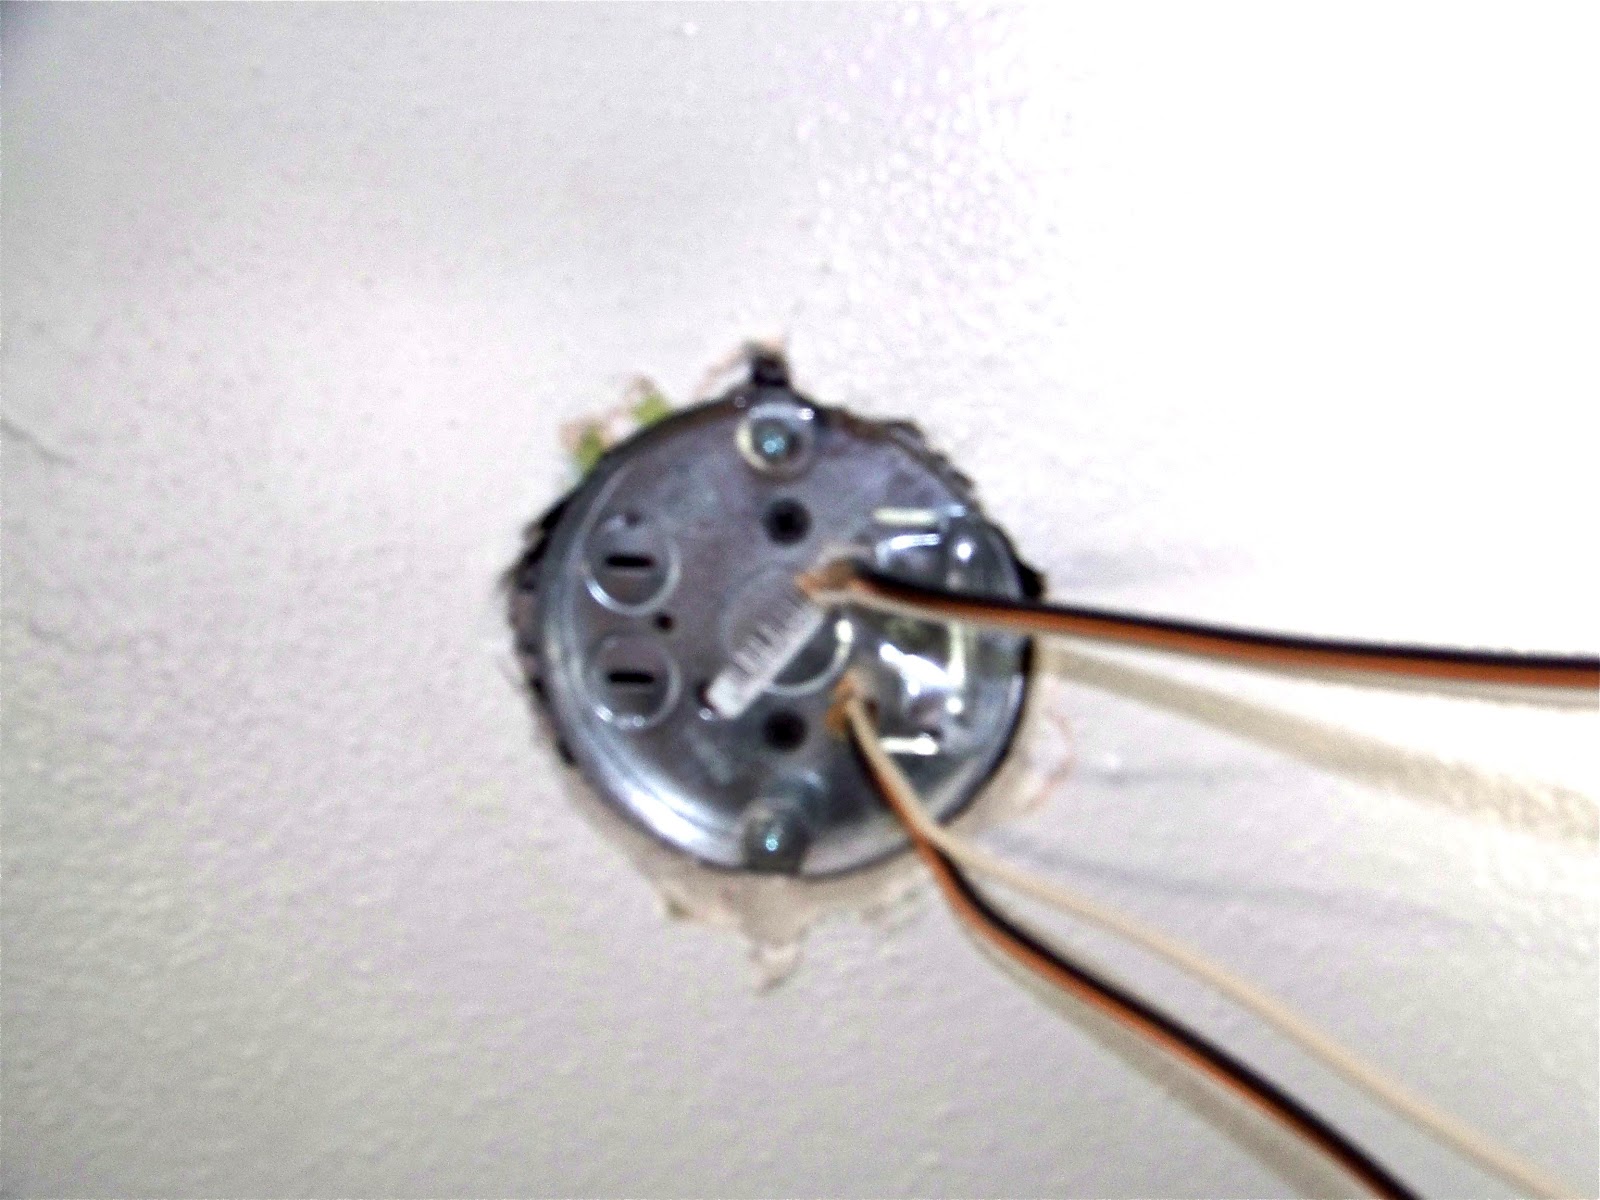
The grounds were twisted together and one was trimmed down so that only one ground wire remained (with the other one twisted around).

The light kit was attached and then all the black wires were tied together and all the whites were tied together using wire nuts. The grounds were tied to the ground nut and as an extra precaution, we used electrical tape around all the wire nuts.

Then we just attached the light and we were done... with a very small part. We basically repeated this over and over and over. We worked on one circuit at a time so that we didn't have to live without power for weeks on end. Total cost was under $1000 so even though it took awhile to get everything done (and we still have a bit more to finish up) it was totally worth saving over $24,000. Also, and this is a big thing in Fl, now that the knob and tube is gone we can get everything inspected and get much better home insurance!
Home Stories A to Z A Beach Cottage
Home Stories A to Z A Beach Cottage
No comments:
Post a Comment