
- Buying the correct materials
- Attaching the wire to the sockets
- Attaching light wires to the main lamp wire
- Attaching to power source
1. First a trip to your hardware store is in order. We use Lowe's since it is closest but anywhere should have this stuff. You are going to need to get: sockets, wire, electrical box with a blank cover, wire connectors, electrical tape and either wire cutters or sharp scissors.
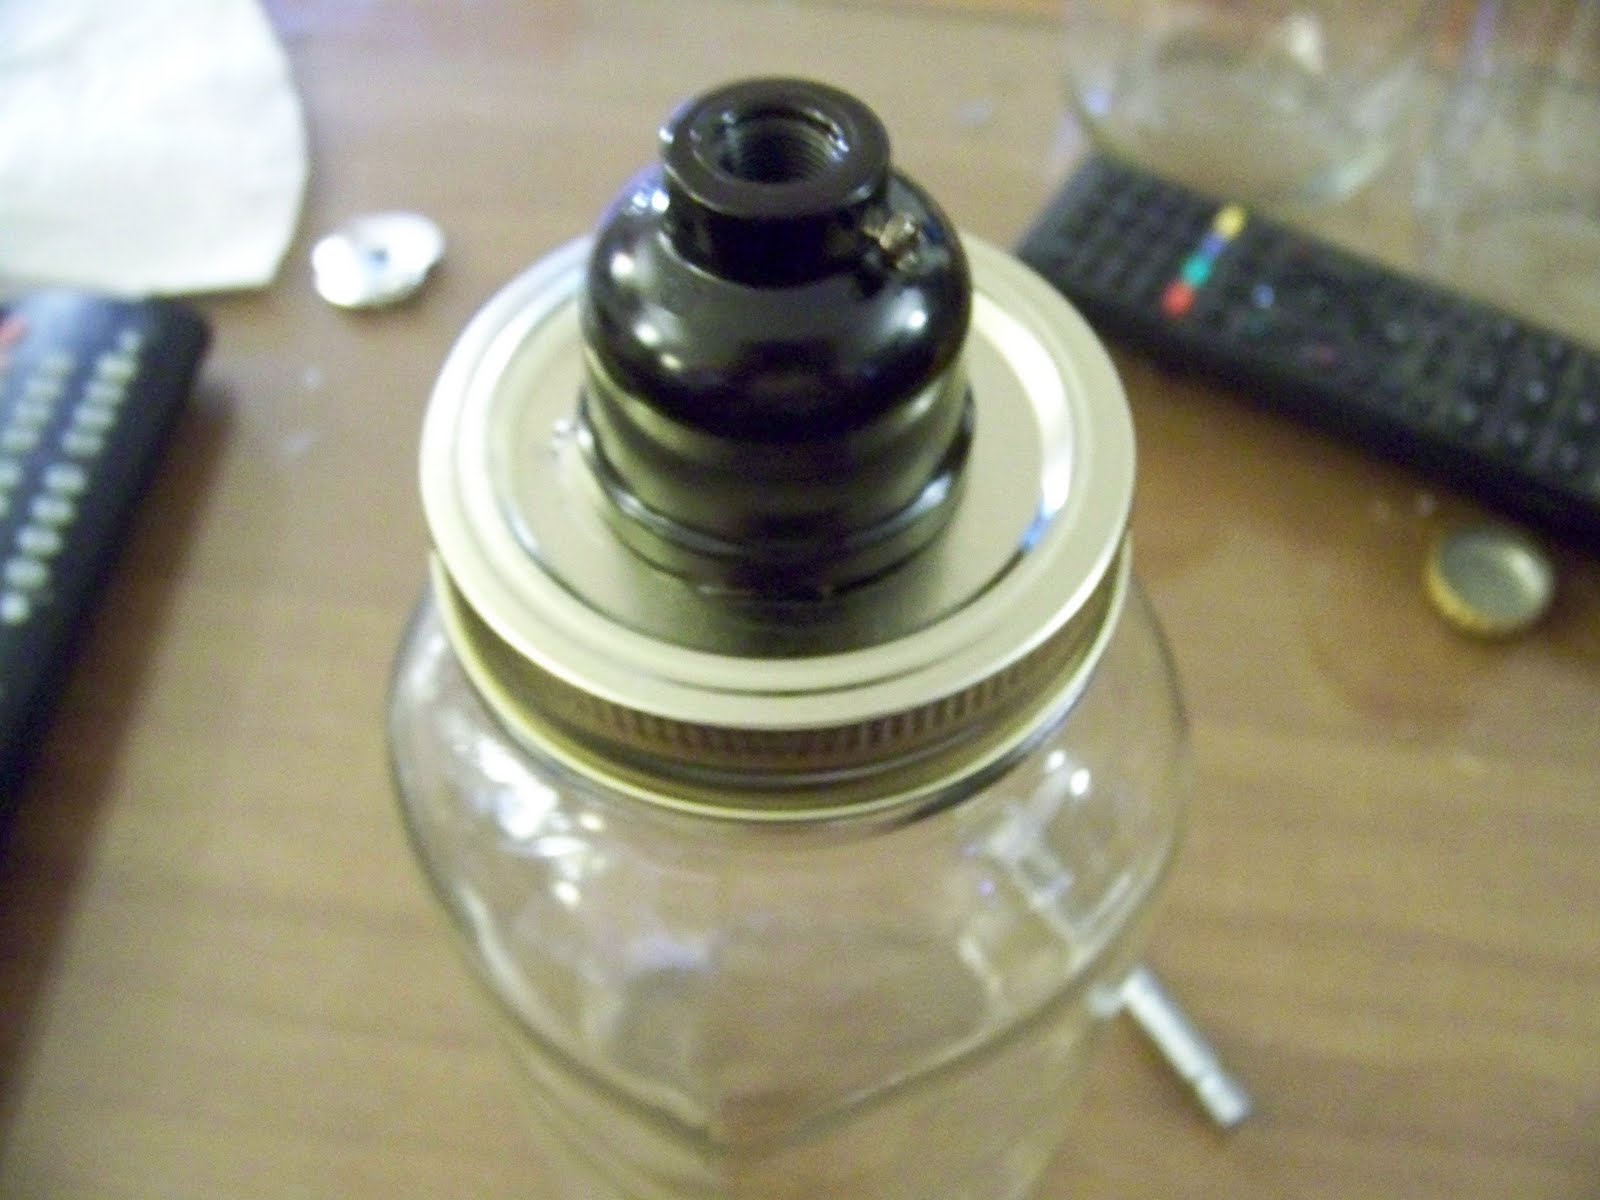
A lot of the sockets that you will find are replacement sockets for pre-existing lamps. What you want to look for is a self-contained socket. This means that is has a cover around it so that you don't see where the wire connects to it. It also screws together in the middle so it allows you to clamp the socket on your jar like this.
Now you need some wire. The gauge of the wire is important because that tells you how many amps the wire can handle (you don't want it to get over heated). Normal house wire that needs to carry 15, 20 or even 30 Amps of current have gauges of 12 or 14. Lamp wire with multiple bulbs is usually 16. This is what you will need to connect all your wires from your bulbs to your main power. You should measure how low you are hanging your fixture and get a little more than you need. You want room for error and you don't want to have any weight on the wire! Wire not only comes in different gauges, but comes with different numbers of wire inside. 2 wire comes with... two wires! This is the minimum you will need. This gives you a hot wire and and cold wire (which you need to light the thing up!). A third wire is needed if you want to ground your fixture (recommended). For the individual light bulbs, you can use a bigger gauge (smaller wire). We used a 22 gauge but it depends on the light bulbs you want to use. If you are using CFL's, this should be fine, but if you want to use conventional bulbs, you use a lower gauge (bigger wire). Lighter gauges are easier to work with. Once again, measure how much you are going to need and get a little more. For the individual bulbs you don't need a ground wire so you only need a 2 wire.
For the electrical box you want a low profile one. You need to mount this on top of your fixture, so you don't want it to show. A blank cover allows you to hide all of the wires in a neat little package. You want to get the smallest box you can. They don't sell ones that are too small.

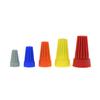 For the wire connectors, you also need to make sure you get the correct size. This is because you don't want the wires to become disconnected and you want them all to fit. You can get a multi pack of connectors (they will be different colors see to the right: From Lowe's website) or you can look on the package and it will tell you the minimum number of wires and the max that will fit. For us, we were connecting 5 -22 gauge wires together with a 16 gauge wire so the yellow connectors are big enough but not too big. You should find electrical tape near the wire connectors
Last thing you need to pick up is wire cutters. If you have sharp scissors and a steady hand, you can get away without wire cutters, especially if you are using small wire.
2. O.K. now that you have everything, you need to put it all together. The important thing to remember is that you don't want the wire supporting any weight. (We used Jute Rope to support the jars) With that in mind, cut your wire into how many pieces you need. You then need to take the outer most covering off of the wire. This is best done by making a slit in the covering and then pulling it back about an inch. This will expose your wires inside. Assuming you got 2 wire, you will see 2 different wires in two different colors. You get to choose which is hot and which is cold but you have to be consistent!! Using your wire strippers or scissors, carefully take off the colored covering on the wire tips. You are going to have to wrap this around a screw but you don't want a lot exposed.
If you unscrew your light socket, you will find two screws, one brass colored and another not. You want to attach your hot wire to the brass screw and the cold wire to the other one. You do this by wrapping the wire around the screw. You want to wrap it clockwise so that when you tighten the screw, the wire wraps more around the screw. The colored insulation should be just touching the screw and the exposed wire should only be around the screw.


3. Once you do this for both the hot and cold, you can reassemble the socket and feed the wire up to your electrical box on the top of your fixture (we drilled holes to feed the wire through). Feed your wires from all of your light bulbs into the electrical box. Strip the ends like you did previously. Also strip the end of the 16 gauge lamp wire. The colors inside this wire might be different but once again you can choose the hot and cold as long as you remember which one is hot and which is cold. (the ground won't have a colored insulator on it) Take a wire connector and gather all of the "hot" wire together. Push them inside the connector and twist the connector. Gently pull on each wire to make sure it is connected. If one come out, simple unscrew and try again. Do the same with the "cold" wires. You want to eventually wrap the connectors in electrical tape for extra durability, but until you make sure it is working, I would suggest not wrapping it up. At this point you have a wired fixture.

4. To get power to your fixture, you need to hook it up to the power in the ceiling. First thing to do: Turn off the power to that circuit!!!!! Then you can take your old fixture down. If the wires coming out of your ceiling are white and black, the black will be hot and the white will be cold. Strip the other end of your 16 gauge wire and, once again, use connectors to connect the hots together and the colds together (Notice above our 16 gauge wire is also white and black so the decision is easy on which is hot and which is cold). Wrap the ground wire around a piece of metal in the box. At this point, if you turn on your power, the light should go on! If everything is working, you can wrap the connectors in electrical tape (wrap once around the wires as well) and close up the electrical box. You are done!
If you are uncomfortable with this last step, get an electrician to do it for you.
Want your own mason jar chandelier? If you don't want to build one, we'll make one for you! Click Here
No comments:
Post a Comment