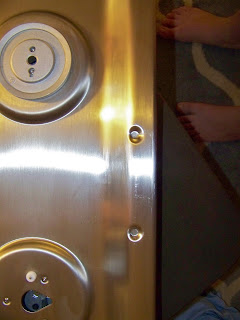
Now that that is out of the way, I can show you the cool stuff. We love love love shopping the clearance sections at Lowe's. We are lucky because our Lowe's has a larger than usual section of clearance items. We've scored some pretty great deals in these sections, but one of our most recent great deals is this
From this view you can tell it's pretty dusty but you may not be able to tell why it was such a great deal. (we took off the grates and burners... it did come with everything)
Can you tell now?
How about in this one?
Or this one?
There were surface scratches all over this thing. This was a floor model and they must have lost the little silicon footies on one of the grates and it caused all of these scratches. This was a heavily debated purchase. It sat in the clearance section for weeks at $600 which was too much for the risk for me. Then it dropped to this
Even at this price we didn't leave with it. We went home and had a long chat and drawing session on which kitchen layout we wanted and what sort of functionality we wanted (double oven or not?... do we really want a separate cooktop and oven?... where do we want to put everything?... these sorts of questions).
Clearly, we answered these questions since we bought the cooktop, but the real thing that brought us over the edge was that Lowe's was having a 10% off appliance promotion which this qualified for and we got to add in interest free financing for fun (and a warranty). At that price, we were willing to take the risk and try and get the scratches out.
The lovely salesmen at Lowe's suggested a Dermel which didn't sound like a terrific choice so we did some poking around online and started with these. These are just your basic 3M scour pads. Going with the grain of the brushed stainless steel, we just rubbed the scratches.
After just a little bit, the scratches were noticeably diminished. It's hard to tell in the pics, but I would say we were able to remove about 80% of the scratches just by using the scour pads.
Eighty percent is not 100% though. In the view you can still see a bit of a difference in the finish.
So, we busted out the scary guns... sand paper. Now I know what you must be thinking, "you are going to sand your stainless steel? Have you gone absolutely nuts???" I know this because these were the thoughts going through my mind. This was a real leap of faith but luckily it worked amazingly well! Once again, you MUST go with the grain. You also have to put in a little bit (aka a lot) of elbow grease, but we are so so happy with the results.
To give you a good before and after, here is the worst scratch.
So this is how we scored a $1000 cooktop for about $280. Now we need to get an equally good deal on a hood and wall oven and we will be set for appliances!
Linking To: Hi Sugar Plum, The Great Indoors, House of Hepworths, My Repurposed Life, Our Delightful Home, Five Days Five Ways, Serenity Now, Lovely Etc., The Rooster and the Hen, Six Sisters Stuff, Tatertots and Jello, Wayward Girls Crafts, Twigg Studio, Serendipity and Spice, Ask Anna, Home Stories A to Z, Uncommon Designs, House wives of Riverton, Crafty Texas Girls, Southern Institute, Watch out Martha!


What grit of sandpaper did you use?? I have a sink badly in need of some repair!!
ReplyDeleteWe started with 180 and then went to 120 for the really stubborn scratches. I would definitely start with the finest grit you can and then work up going with the grain. Good luck!
DeleteI am totally going to try this.
ReplyDeleteWow, what an informative post. I would have never known this was possible. Thanks for posting this.
ReplyDeleteunbelievable! what a bargain, now that you got it looking good as new!
ReplyDeletegail
Goodness me how brave of you to go with sandpaper! What a good job and a cooker at a bargain price, well done.
ReplyDeleteThis is awesome! Who knew?? Thanks for sharing your ideas on "Strut Your Stuff" Saturday! We hope to see you again! -The Sisters
ReplyDeleteGreat job!!
ReplyDelete